Paper Weights and Printing Behind the Scenes July 31, 2015 11:04
By day we are an architect and an engineer. So we are comfortable in the design world. But when it comes to our new endeavor (UPstudio) there are many hats that we have had to put on that we aren't so comfortable with yet. We've had to be business ladies, marketing ladies, researchers, website developers, the list goes on and on. We have learned so much already and we continue to be educated every day by all of the people helping us along the way (and by google).
Since our first three products (calendar, everyday cards, and the planner) are paper products the first thing we had to be educated on was paper and printing.
We won't bore you with all the information we have learned, but we did want to talk about the two big things in regards to paper and printing that drove our decisions: 1: Paper Weight and 2: Digital Versus Offset Printing.
Paper Weight:
We learned that are many ways to measure the weight of paper. The most common way is the U.S. Basis Weight. This was a little hard for us to wrap our head around at the beginning because the same paper can yield different values based on the “Basis Weight” applied while manufacturing the paper. The most common are Bond, Text, Book, Cover, Index and Tag. Higher values don’t always equate to heavier/thicker print media. For example, a sheet of 100lb Text paper is actually much thinner than an 80lb Cover stock. We learned Cover stock was our best option because it is the thickness and would give us the most durable products. We decided on 160 lb cover stock for our Everyday Cards and 130 lb cover stock for our Calendars after looking over tons of samples. The “Basis Weight” is defined as the weight of 500 sheets of paper in its basic unit uncut size. An uncut sheet of Cover paper is 20 x 26 inches. So our 160 lb cover stock really means that 500 sheets sizing 20" x 26" weighs 160 lb.
(Are we boring you yet? If so, feel free to scroll down to the cool behind the scenes pictures of our offset printing!)
Digital Versus Offset Printing:
The two most common commercial printing technologies are digital printing and offset printing. Offset involves a mechanical process of applying layers of ink to paper with a series of rollers. The printing plate (containing your design) is mounted on a roller. Ink and water are applied to the printing plate. The ink binds to the part of the plate that contains design elements; the water is applied to the white space portion of the paper. Oil is mixed with the ink to ensure that the ink and water repel each other and there is no smearing or blotchiness on the finished product. The plate cylinder transfers, or offsets, the design onto a rubber blanket roller, which in turn transfers the design onto the paper. When doing multiple colors, each roller would have it's own specified ink – Cyan, Magenta, Yellow and Black — or CMYK. As each of these rollers pass over the page, they transfer ink and build layers of colors, resulting in complete images and text on the page.
Digital printing eliminates the numerous steps involved in the offset printing process, such as creating films and plates for ink rollers. Most digital presses today apply ink in a single pass from a single ink head, similar to common inkjet printers found in homes and offices.
There are many pros and cons of both technologies. The three biggest differences that applied to us were:
- When printing large areas of one color on a digital printer the ink has a sheen to it even if you print it on smooth matte paper. That wasn't really the look we were going for with our large black printed areas. We really wanted a matte finish.
- Most digital printers can only handle cover weight up to 120 lb, some up to 130 lb.
- Offset printing is usually more expensive by a considerable amount. (Makes sense right based on the process descriptions above.)
So, based on all our research we felt like the parts of our product that were printed in mostly black should be printed offset so that we would get the matte finish we desired. Everything over 130 lb weight also had to be printed as offset. This meant our only option for the Everyday Cards was offset printing. But for the Calendars we decided to print the back offset and the front digital, to save some money. This drove the choice for the 130 lb paper, because that was the max the digital printer could take.
We researched and vetted all of the local small format printers we could find in Raleigh in search of the best price and the best customer service. In the end we went with Commercial Printing Powered by AlphaGraphics. They actually do their offset printing in house and they were nice enough to send us some pictures of our Everyday Cards and Calendars being printed.
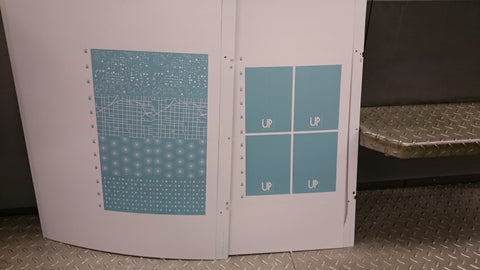
The plates made for the offset printing:
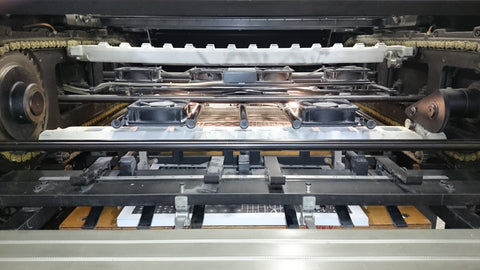
Some offset process photos:


Final sheets prior to cropping (look just like the plates):


Again, we just hit some of the key points today, but if you are thinking about getting into paper products or are just curious about other aspects feel free to comment below with questions or shoot us an e-mail. We are no experts, but are more than willing to share the knowledge we have.
-- Mary Beth and Becky